It’s not Halloween until you pick out a few pumpkins from the pumpkin patch and bring them home to decorate. While sculpting a scary face into a Jack-o’- lantern is definitely a precious past time, if you want to create something a little more special and colorful, think about utilizing our unique Halloween-themed templates.
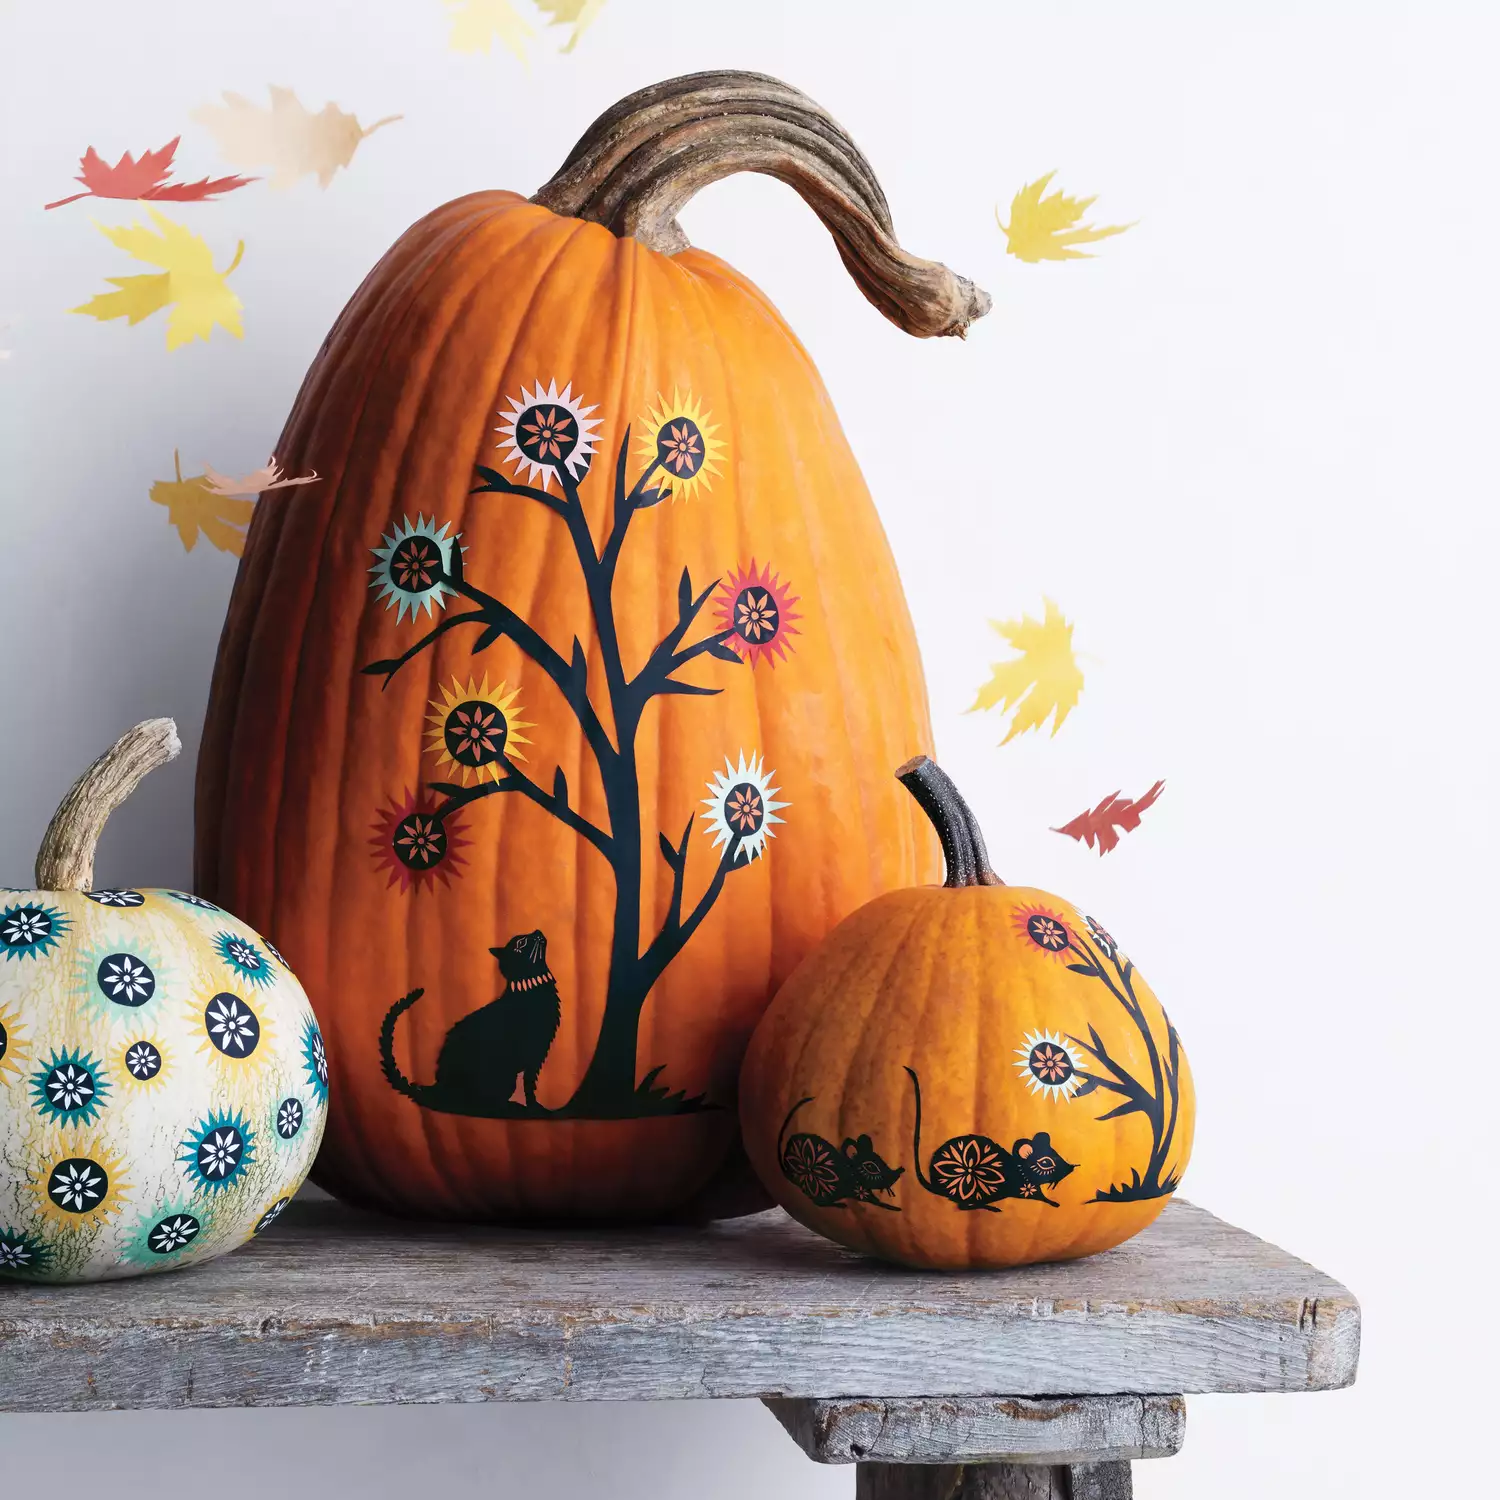
There are three looks you can attain when using our clip-art to découpage pumpkins, including one covered with sunbursts, one with a feline and sunbursts, and one with mice and sunbursts (all imagined above). These seasonal templates were created for us solely by artist Angie Pickman. Print out the templates you like, cut them out, and put them on your pumpkin silhouette-style, to set a spooky state of mind– perfect for any event this fall.
What You’ll Need
Materials
Plain white uncoated paper
Precision scissors
Colored tissue paper
Binder clips
Découpage medium
Paintbrush
Pumpkins
Black feline, mice, flowers and sunbursts design template
Guidelines
Print Clip-Art:
Print clip-art template on uncoated paper. Cut around boundary; the “cutouts” within the styles are white or orange, so use the one that will blend with the color of your pumpkin (orange cutouts go on an orange pumpkin, white cutouts go on a white pumpkin).
Print Starburst Templates:
Print starburst templates and cut out shapes. Trace template onto the leading layer of tissue paper.
Apply Découpage and Add Clip-Art:
Brush découpage medium onto pumpkin. Smooth the clip-art (feline or mice design templates) into location over the medium, placing the vibrant starbursts under the clip-art as you go. Brush paper and area around it with another coat of découpage medium. Let dry.