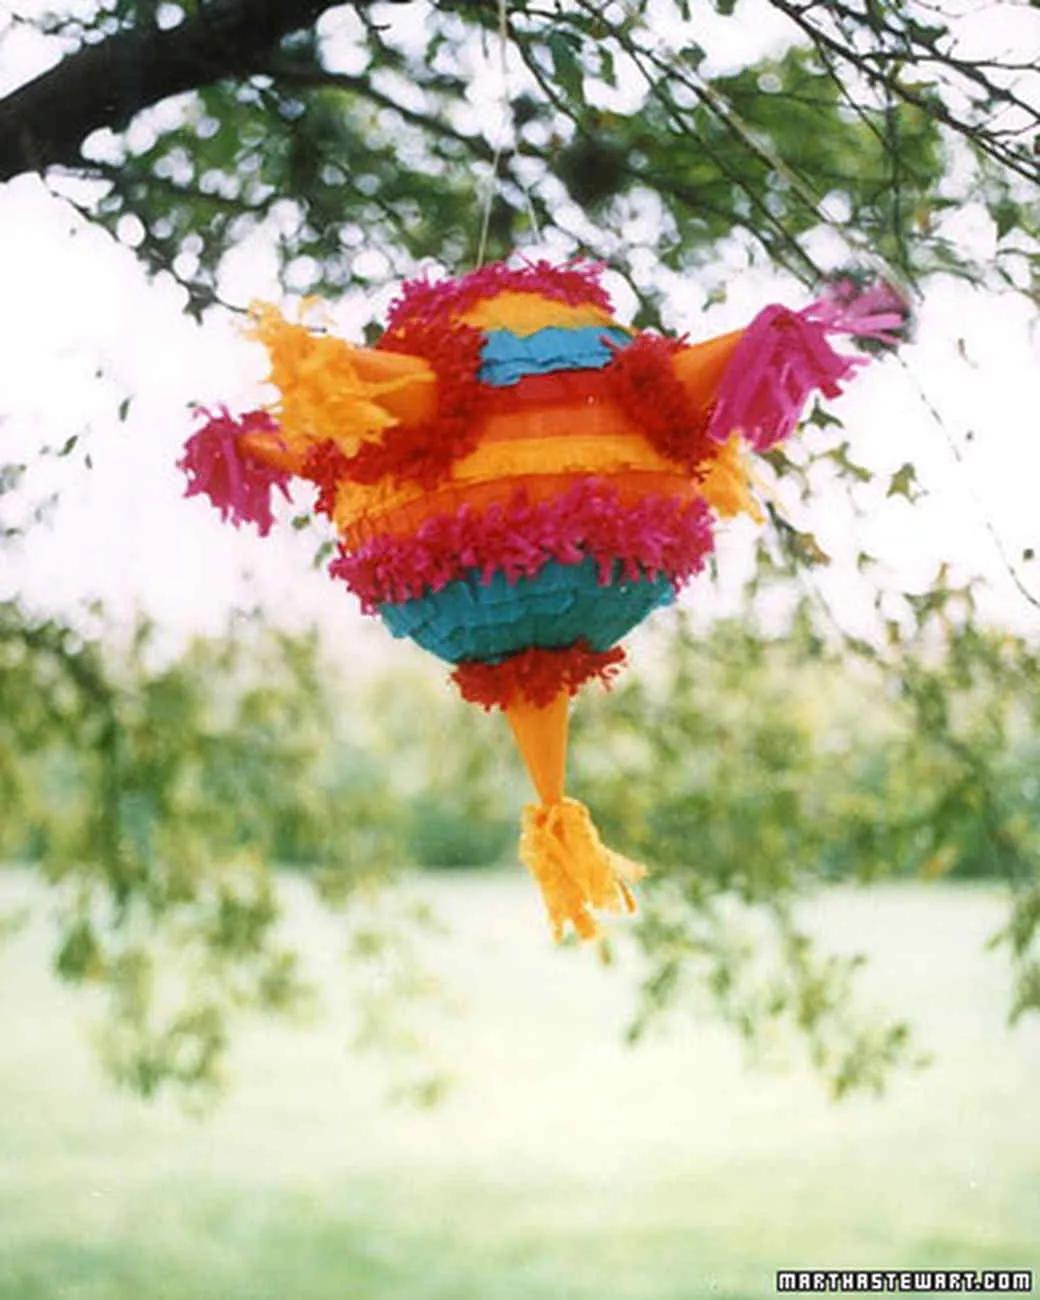
Long associated with Mexico, pinatas really come from Italy, where clay pots were filled with treats and slung high in the air to be broken with sticks. Embraced by the Spanish, the custom-made got here in Mexico with the explorers, who had because started to add color and decor. When tissue paper became extensively offered during the 20th century, the pinata developed once again, integrating more design and colors than ever before.
Papier-mache is a popular craft method that includes covering a kind– like a balloon or a bowl– with strips of newspaper soaked in an easy, frequently homemade, paste; the paper and paste bond as they dry, forming a hard shell around the form. Attempt using wheat-paste powder, readily available at hardware and art-supply stores, instead of ordinary flour– the resulting paste will be less susceptible to splitting.
What You’ll Need
Products
14-inch balloon
Fabric tape
Scissors
Newspaper, cut into 1-by-6-inch strips
Wheat-paste powder
Strong white paper (20-pound copy paper works well).
Spray install.
Compass.
Craft glue.
Tissue paper in several colors.
Rotary cutter (optional).
Self-healing mat (optional).
Utility knife.
Large needle or piece of wire.
Tissue-paper banners.
Strong cord.
Candy, treats, and little rewards, for stuffing.
Guidelines.
Inflate the balloon, and coax it into a round shape by wrapping it with cloth tape. Set it aside.
Make paste: In a medium bowl, mix 1 cup wheat-paste powder with 4 1/2 cups water. Dip paper strips one at a time into the paste, and position them on the balloon, overlapping the strips somewhat, until the balloon is completely covered.
Our pinata style calls for six cones; to make them, cut six sheets of strong white paper into 7-inch squares. Roll the paper into a cone, and glue or tape the straight edges together where they fulfill. Fold the notches external, and utilizing craft glue, adhere the cone to the pinata.
For the fringe decor, start by cutting tissue paper into narrow strips about 3 inches long and 1/2 inch broad. Beginning at the bottom of the pinata, glue the strips, fringed edge up, in a tight circle. Glue a couple of rounds of tissue paper over the fringe at the top and bottom of the pinata.
To finish the pinata, use an utility knife to cut a small trap door near the top. Utilizing a piece of wire or large needle with a length of strong cable attached, punch 2 holes at the top of the pinata, and pull the cord through the holes.
For a final touch, twist 10 streamers together for each cone; apply a dab of craft glue to the twisted end, and tuck it into the small hole at the end of the cone. Repeat this for each of the cones. Fill the pinata with a selection of sweet, deals with, or prizes; press the flap back into location, and hang your pinata.